
Configuring privileges for your team
When you set up a new team member in QuickFile, you may want to stop them using certain areas. For example, a member of your sales team might need to create quotes and invoices but not see your bank accounts or management reports.
QuickFile makes this simple: you choose from a set of features for each team member, and anything you leave unticked is blocked for them.
Prefer to watch?

Prefer a video walkthrough? Watch our Manage Team Members in QuickFile | Add, Edit & Remove Users tutorial on the QuickFile Help Guides YouTube channel.
Before you start
- You must be logged in as the administrator login (the Primary Contact). Only the administrator can change team members’ privileges.
- The person already has a team member login. To add one, see Adding new users to your account.
How do I restrict features for a given user?
-
Click Account Settings in the top menu, then click Team management.
-
In the list of team members, click the padlock icon in the Privileges column next to the user.

-
In the Features enabled for window, tick the features this person may use and untick the ones to restrict. The features are grouped into Sales, Purchases, Banking and reports, and General account functions. Scroll down to see them all.

-
Scroll to the Banking and reports and General account functions groups and check those too.

-
To see what a feature does, hover over the question mark icon next to it. These descriptions are also listed below.
-
Click Save Updates. QuickFile shows a green message that the privileges have been updated and that any active sessions for this user have been terminated.


Please note: Because saving ends the user’s active sessions, they need to log in again before the new privileges apply. Tell them first if they are in the middle of work.
Who can change the enabled features?
Only the administrator login can choose which features are enabled for each user. The administrator always keeps full privileges, so you cannot restrict the administrator login.
If you click the padlock next to the administrator, QuickFile shows an Enabled Features window explaining this. To make someone else the administrator, edit that user and tick Administrator Account; there can only be one administrator on an account.
What happens if a user tries to open a restricted feature?
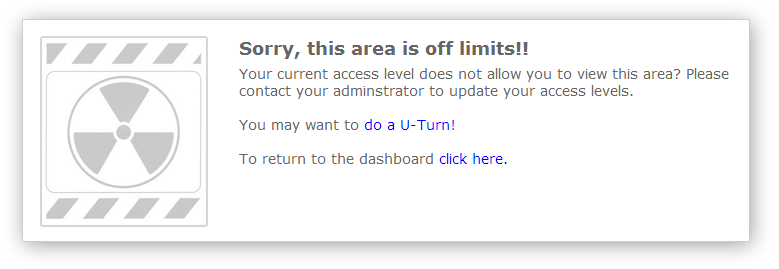
When a feature is restricted, QuickFile changes the user’s menus so they cannot get to that area. If the user has bookmarked a page in a restricted area, they are sent to a holding page that points them back to the Dashboard or the page they were on before.
Explanation of available features (privileges)
These are the features you can enable for a team member.
Sales
| Privilege | What it enables |
|---|---|
| Sales invoice and estimate creation | Create sales invoices and estimates, both manually and through bank tagging (if enabled). |
| Client creation | Create new client records, manually or while creating a sales invoice. Existing client records can still be viewed and changed unless you restrict that separately. |
| Log sales payments/credits | Allocate payments to sales invoices or create unallocated credits. |
| Invoice and payment management (overview) screens | Open the sales invoice and payment management screens, which list all sales invoices and payments and can be searched with advanced search. This does not give access to individual invoices; that is a separate feature. |
| View/modify individual sales invoice and estimate records | View and change sales invoices. This does not give access to the invoice management overview screen, which is a separate feature. |
| Client management (overview) screen | Open the client management screen, which lists all clients and can be searched with advanced search. This does not give access to individual client records. |
| View/modify specific client records | View and change client records. This does not give access to the client management screen. |
Purchases
| Privilege | What it enables |
|---|---|
| Purchase invoice and purchase order creation | Create purchase invoices and purchase orders, both manually and through bank tagging (if enabled). |
| Supplier creation | Create new supplier records, manually or while creating a purchase invoice. Existing supplier records can still be viewed and changed unless you restrict that separately. |
| Log purchase payments/credits | Allocate payments to purchase invoices or create unallocated credits. |
| Invoice and payment management (overview) screens | Open the purchase invoice and payment management screens, which list all purchase invoices and payments and can be searched with advanced search. This does not give access to individual invoices. |
| View/modify individual purchase invoice/order records | View and change purchase invoices. This does not give access to the purchase management overview screen. |
| Supplier management (overview) screen | Open the supplier management screen, which lists all suppliers and can be searched with advanced search. This does not give access to individual supplier records. |
| View/modify specific supplier records | View and change supplier records. This does not give access to the supplier management screen. |
| Receipt Hub and Document Manager | Open the Receipt Hub and the Document Manager. |
Banking and reports
| Privilege | What it enables |
|---|---|
| Bank account view and create functions | Open all bank accounts and create new ones. All bank tagging rules are also enabled. Bank balances can still appear in some reports unless you restrict Reports. |
| Reports | Open all reports, including Chart of Accounts, Profit and Loss, Balance Sheet, Debtor Ageing and any other report under the Reports menu. Sales and purchase invoices can still be reached through invoice management unless you restrict those. |
| Projects | Open and change projects. |
| Journalling | Create journals, and view and change existing ones. |
| Create or delete nominal accounts | Create or delete nominal accounts, normally done in the Chart of Accounts. |
General account functions
| Privilege | What it enables |
|---|---|
| Access to account settings area | Open all account settings, in general everything in the Account Settings menu. |
| Internal messaging system | Use the internal messaging system to communicate with clients. |
| Letters | View and change letters. |
Troubleshooting
I changed a user’s privileges but they can still (or cannot) do something.
Saving ends the user’s active sessions, so ask them to log in again. If the result is still wrong, open the padlock again and check the feature and its matching overview or record feature, because they are separate (for example Client management (overview) screen and View/modify specific client records).
Can I give a user access to only some clients?
No. Privileges apply to a whole area, not to individual clients (see this community forum thread).
Can I give someone read-only access?
There is no read-only option. You can limit which areas they see. Important actions on the account, such as creating, editing or deleting invoices and creating journals, are logged (see this forum thread).
I cannot restrict or delete my own login.
The administrator login always has full privileges and cannot be deleted. To delete it, first make another user the administrator by ticking Administrator Account when you edit that user.
What should I give my accountant?
It depends on what they need to do. For someone reviewing your accounts, you can either enable all privileges or limit them to Reports only. For more on this, see this forum thread.
Related topics
To add, edit or delete team members, see the article below.
- Adding new users to your account: Create a team member login before you set their privileges.
- What privileges does an Admin have over regular users? (community discussion): How the administrator login differs from other team members.
- Change Account Administrator (community discussion): What to do if you need a different person to be the administrator.