Connecting to Zapier
What is Zapier?
No App is an Island! Zapier makes it easy to connect together 100s of your favourite applications in the cloud. At QuickFile we are regularly asked if we can connect to xyz application. Digesting every technical spec for each integration, writing the code, testing, not to mention the ongoing maintenance whenever anything changes is a time consuming and costly undertaking.
Fortunately Zapier have developed a clever intermediary service that links together all supported applications based on a trigger, action pattern. In simple terms that means if trigger x happens in one application, then perform action y on another application.
Example:
I add a contact to GMail (trigger), now go and add this contact as a client in QuickFile (action).
Reverse Example:
I add a client in QuickFile (trigger), now go and add that contact to GMail (action).
In essence Zapier makes it simple for non-techies to link together your applications.
What Apps can I connect to QuickFile through Zapier?
You can find a full list of supported apps here:
What Triggers are supported?
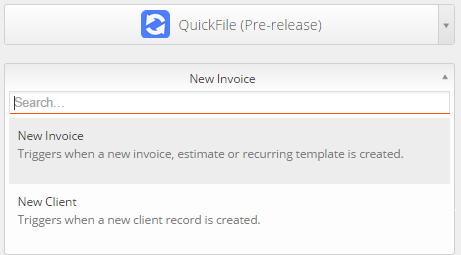
By trigger we mean some event on QuickFile. Currently we support the following two triggers.
- Client Created
- Sales invoice/estimate or recurring template created
What Actions are supported?
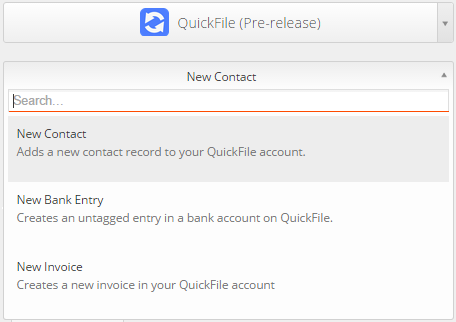
By actions we mean some trigger in another app performs an action in QuickFile.
- Create a client
- Create a bank entry
- Create an invoice/estimate
What does it cost to use Zapier with QuickFile?
In order to use Zapier on QuickFile you will require a Power User Subscription . Zapier also have a separate pricing model including a free tier, dependent on usage.
https://zapier.com/app/pricing
Granting Zapier access to your QuickFile account
Zapier uses the QuickFile API to push new data into your account. For any Zap that you configure whereby QuickFile is defined as the “action”, you will need to enter some API credentials and also create an Application in your QuickFile account that Zapier can hook on to.
When you connect Zapier to QuickFile you should see a screen like this.
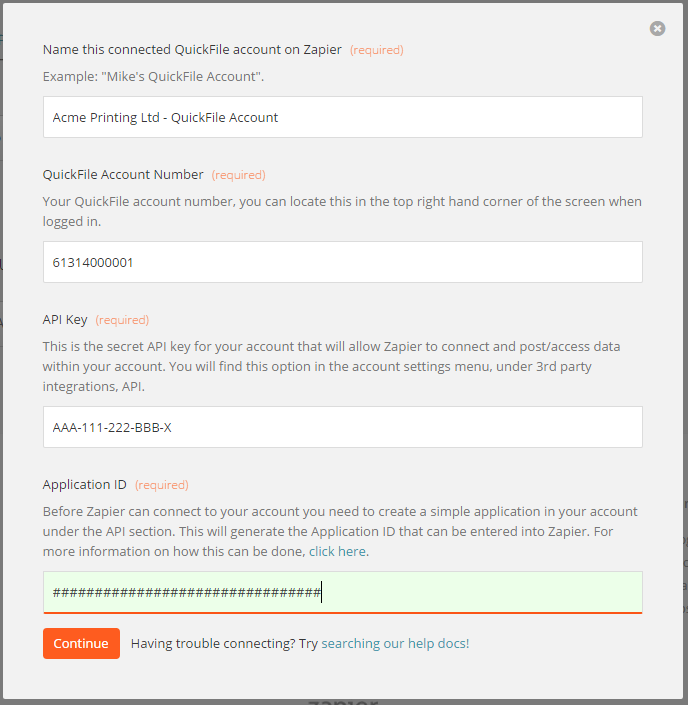
The last field will ask you to enter an Application ID. To get the Application ID you first need to create an application definition in your QuickFile account, here’s how:
-
From your QuickFile Dashboard, go to the ‘Account Settings’ menu, select ‘3rd Party Integration’ followed by the ‘API’ option.
-
Now click the green box to create a new Application.
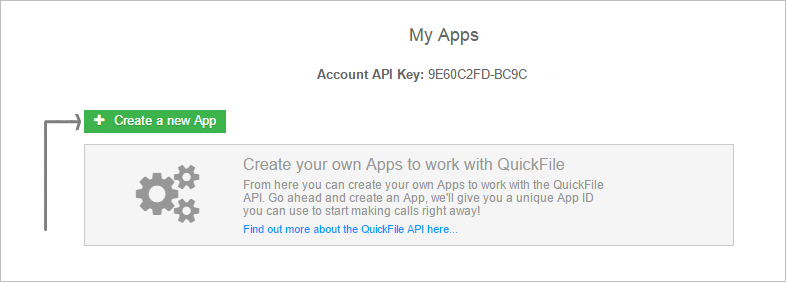
3. Enter a name and description for the Application, then add all the available API methods to the box on the right, this will give Zapier full access.
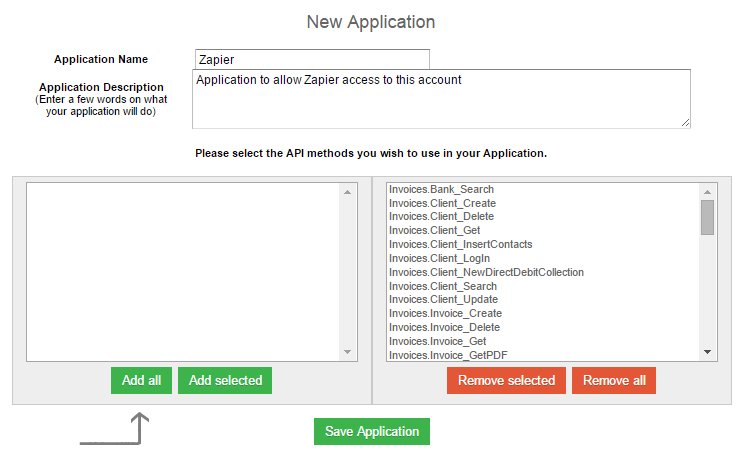
4. Save the application and your new application will be assigned an Application ID.
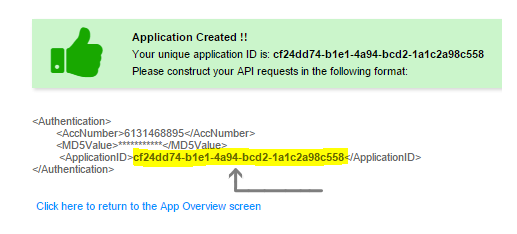
5. Now copy and paste this Application ID into Zapier when connecting to your QuickFile account.
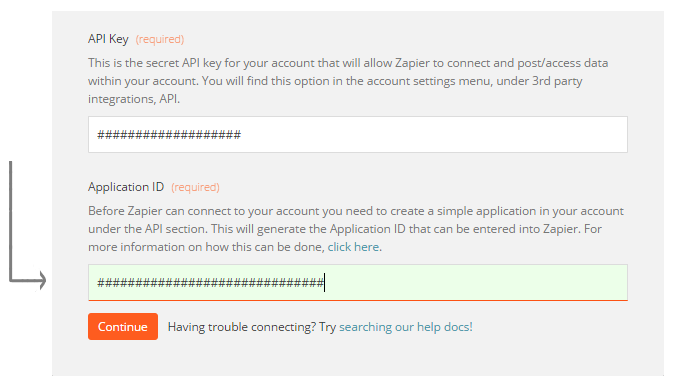
Once you save your settings in Zapier, you should see a button to test the account, this will confirm that Zapier has full connectivity with your QuickFile account.
Ongoing development
Zapier is a great tool that we want to support and extend. Getting different applications to talk to one another will be a big part of the cloud in the next 10 years.
If you’d like to contribute your ideas or suggestions on what additional features (triggers, actions etc) you’d like to see supported on our Zapier integration, please reach out to us on our Forum.