- Introduction
- Add a new client
- Issue date and due date
- Adding your invoice items
- Creating inventory items
- Tagging your invoice/estimates to a project
- Invoice name, additional notes, and payment terms
- Preview and send your invoice
- Logging a payment
- Design customisation
- Recurring invoices
- Bulk invoicing
Create your first invoice
Introduction
Creating your first invoice in QuickFile is simple. When you create a new invoice you can grant access to a fully branded control panel where your client can view, download, and pay their outstanding invoices.
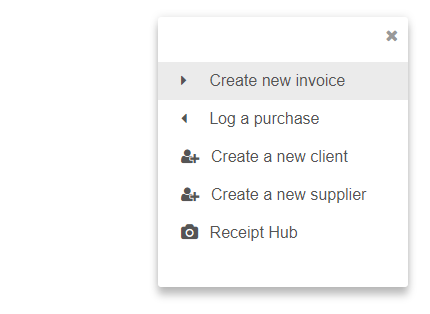
You can start creating a new invoice by clicking on the plus icon in the top right hand corner of the dashboard and selecting “Create new invoice”.
Add a new client
Once the new invoice editor screen has loaded you can start by selecting a client to whom you would like to address this invoice. As this is your first invoice you will want to start by adding a client record.
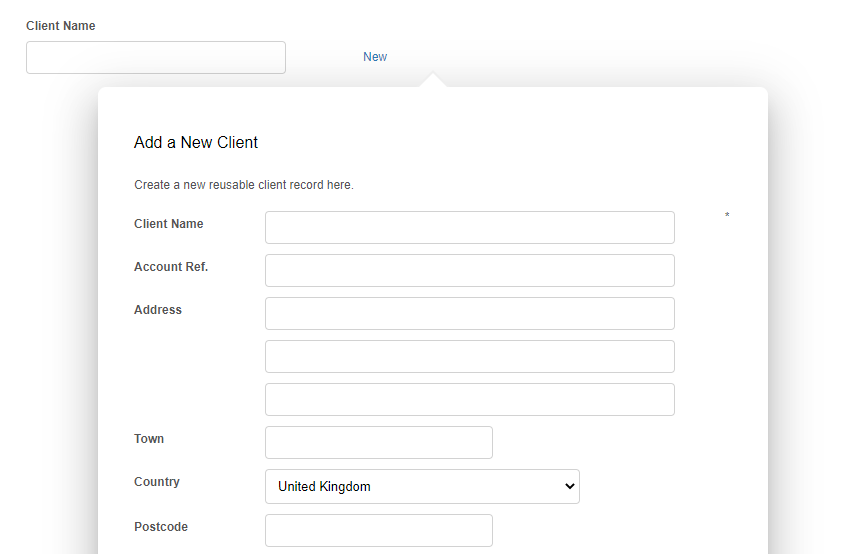
You can enter as little as a name to start with. If you want to provide login access for your client to view, download and pay their invoice online, you will need to supply a contact name and email address.

If you would like to use our “Snail Mail” facility for sending hard copy invoices direct to your client, then you will need to provide a valid postal address. Although any of this information can also be added later. We’ll handle the printing and posting of your invoice for you for a small fee - often less than the price of a stamp, we’ve also given you £1.20 credit to get you started.
Issue date and due date
QuickFile automatically creates incremented invoice numbers whenever you add a new invoice to the system. You can set the “Issue Date” and the number of days you are giving for your client to pay in the top right-hand corner of the screen.
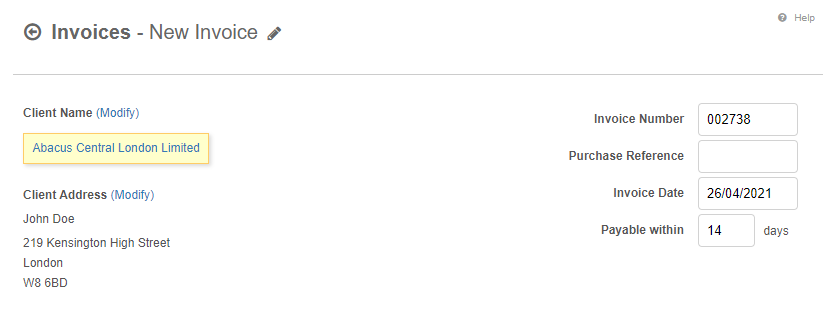
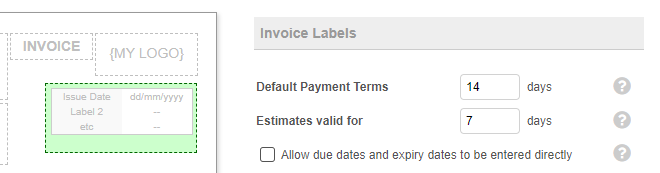
If you prefer to enter the “Due Date” directly, rather than entering the number of days to pay, then this preference can be changed within the “Invoice customisation” screen. You can access the “Invoice customisation” screen from the “Sales” menu.
Adding your invoice items
Now it’s time to start adding your invoice items. You can key in the description, quantity and net amount directly into the table. If your item is VATable then you can select from a predefined set of VAT rates. As you enter the individual items the footer totals will automatically update below.
To add additional item lines just click on the green plus button. You can also slide the row into different positions using the blue handle:

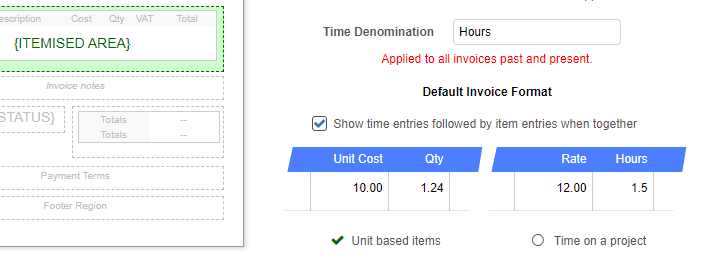
QuickFile also allows you to invoice for time spent on a job. To add a time-based event to your invoice simply click on the “Add New Line” button.

You can change the default interval within the invoice customisation screen. The default value is hours, but you can invoice in days, months or whichever denomination you choose.
Creating inventory items
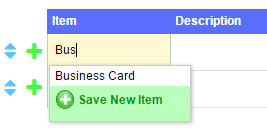
Inventory items offer a quick way to deploy common items in your invoice. Inventory items can be predefined in the “Item/Inventory Management” area. When you put your cursor in the “Item” column and start typing you will see a list of pre-saved inventory items. You can add new items on the fly from here as well.
Tagging your invoice/estimates to a project
Projects are a great way to group together your sales, expenses, estimates and purchase orders into a single container. You can apply up to five project tags on a single invoice or estimate. You can either apply your project tags when you create your invoice/estimate or on the preview screen.

You can find out more about projects in QuickFile here
Invoice name, additional notes, and payment terms
Once you have entered all your invoice items you can now furnish your invoices with additional information such as an invoice name, notes or payment instructions. The notes could refer to delivery timescales or include specific information relating to the order. The payment terms would typically include bank details or cheque delivery instructions to make it easier for your client to pay you.
I’m sure you don’t want to constantly type in your instructions for every invoice, that’s why QuickFile allows you to save your default notes and terms so they automatically appear in all future invoices.
To save you retyping your notes and terms into each invoice you can setup some defaults within the “Invoice customisation” area. This screen can be accessed from the “Sales” menu.
You will also find lots of other handy options here to tweak your invoices.

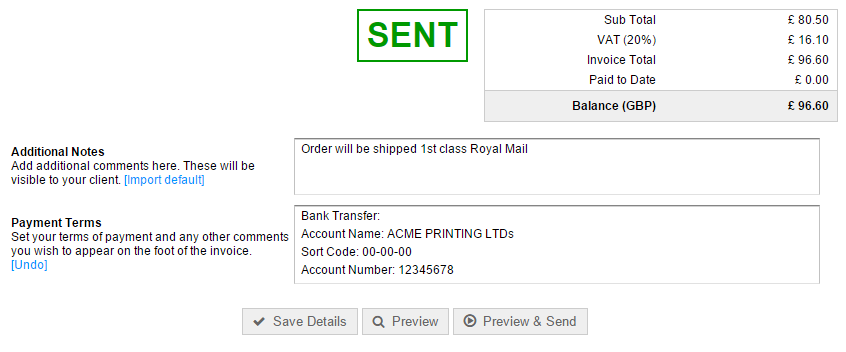
Preview and send your invoice
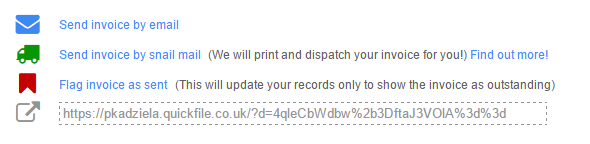
OK all done. It’s time now to preview and send your finished invoice. Click on the “Preview” button and you should see a nicely formatted draft of your invoice. You can view a PDF version of your invoice by clicking the “Print” button or if you are happy to proceed then you can send it directly to your client.
Providing you entered an email address and contact name for your client, the system will send a link directly to a branded client area where your client can preview their invoice along with any invoices you have issued to this client in the past.
Please note: If you would prefer to request your client to manually login (with their email and password) in order to view their invoices, this setting can be invoked from the client edit screen in your account. Simply check the box “Enforce client login”.

If you just want to flag the invoice as sent without notifying the client, then simply click on the corresponding link. Updating the invoice to “Sent” ensures that the balance of the invoice is then registered on your debtor account and will be visible on your Dashboard.
Please note: The invoice is sent or flagged as sent it will be held as a DRAFT invoice - so will not affect your nominal accounts.
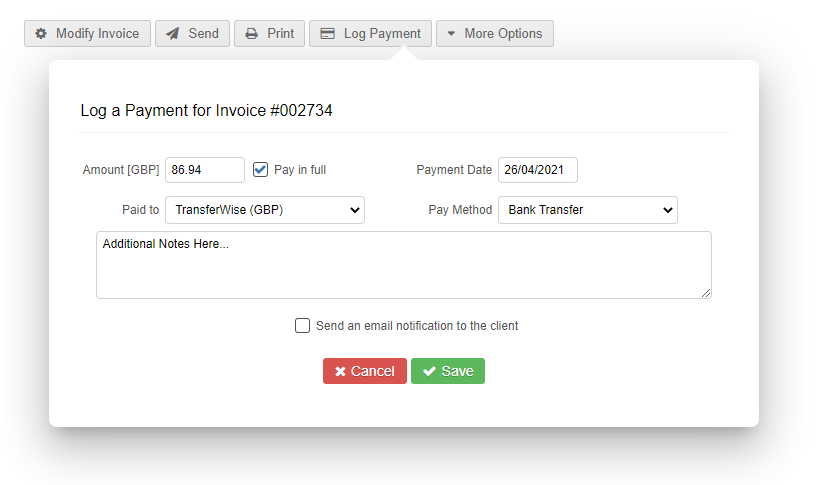
Logging a payment
You can log a payment against an invoice from the “Preview” screen or on your main list of invoices.
When you click on the ‘Log Payment’ button a pop-up will appear where you can enter the amount paid, payment date, payment method and depositing bank account. Once the payment is saved a deposit will be made into the corresponding bank account.
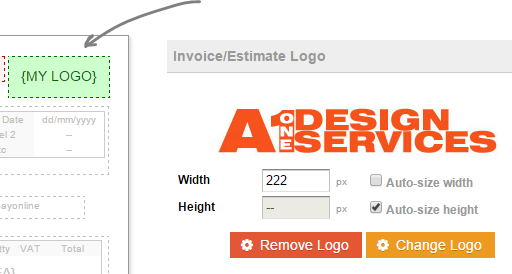
Design customisation
Now you have created and paid your first invoice you may want to look at our full range of customisation tools. One thing you’re probably going to want to do initially is upload a logo to your invoice. You will find this option in the Sales menu under Invoice customisation.
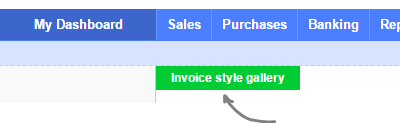
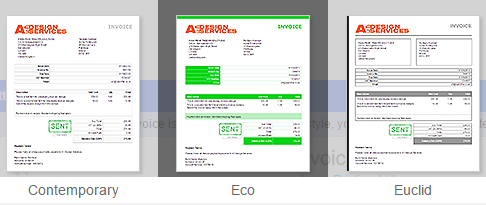
Also on your invoice preview screen you will see a green button in the top left Invoice style gallery. This will open a selection of invoice templates you can instantly apply.
If you’re confident in CSS, you can also fully customise your invoice design using our built in CSS editor.

Recurring invoices
If you’re looking for a way to setup recurring invoices to be automatically sent over a fixed interval and period you can take a look at the recurring invoice guide here.
Bulk invoicing
If you need to enter a whole load of invoices in one go then be sure to take a look at our multi-invoice tool .