Journals
Introduction
Journals offer a simple way to transfer funds from one nominal account to another. They are generally used by accountants and bookkeepers to quickly fix problems and close off accounting periods. Journals are entered in pairs and involve a simple debit and credit, one line representing a debit from a nominal account and another a credit to the opposing account. You can enter multiple pairs or groups on one single journal providing the amounts balance.
How do I enter a journal?
You can view your existing journals and create a new one by going into the “Reports” menu and selecting “Journals”.

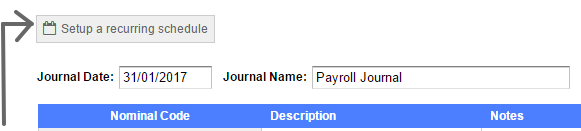
When you click the “Create” button you will see a simple grid like the one below. You can now start entering the individual journal entries, and commit them once you are done.

Reviewing and modifying journals
You can obtain a list of recent journals from the main Journal screen. From here you can click to view, modify, or delete previously entered journals.
Recurring Journals
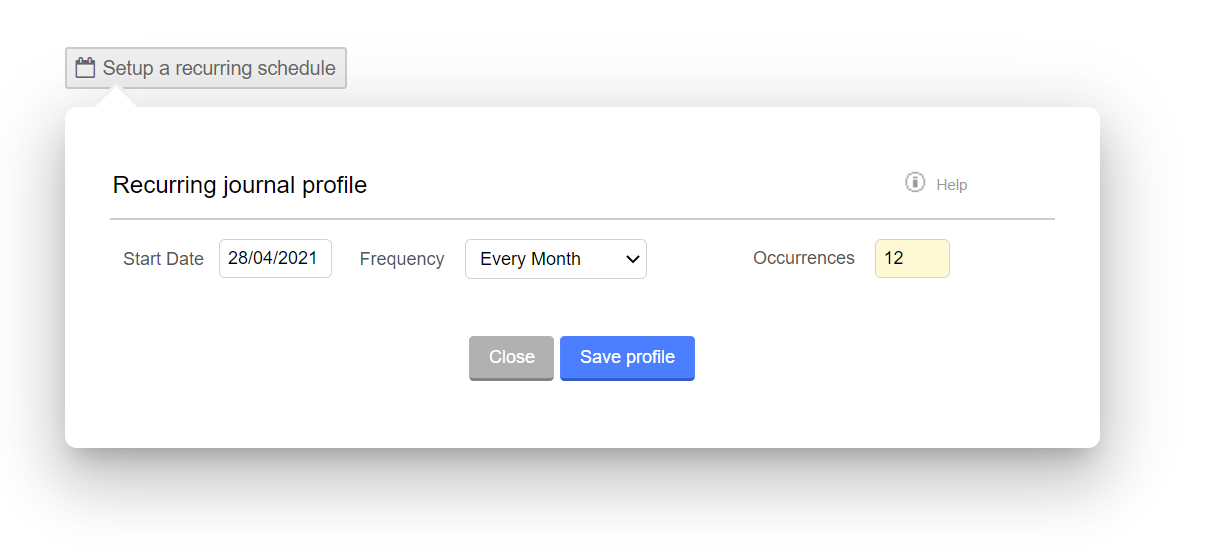
Once you have created a journal you can define a schedule to repeat this journal on a weekly, monthly, or yearly basis. Once the journal has been created you will see a button to setup a new recurring profile.
When you click on the button a dialogue box will appear allowing you to configure the start date, frequency and number of occurrences:
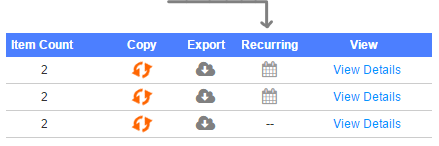
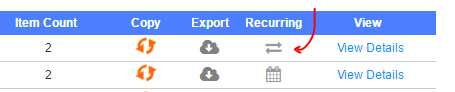
You can see a list of recurring profile templates on the journal management screen. Those journals with schedules associated to them will show a small calendar icon (![]() ) in the list. If you wish to prematurely cancel a schedule you can do so by previewing the original master journal, clicking the yellow tab and deleting the schedule.
) in the list. If you wish to prematurely cancel a schedule you can do so by previewing the original master journal, clicking the yellow tab and deleting the schedule.
Recurring journals are ideal for depreciating the value of an asset over a defined period of time.
Reversing Journals
Reversing journals allow you to automatically reverse a set of journals at a set date. A reversing entry is often used in situations when either income or expenditure were accrued in the preceding period, and you do not want the accruals to carry over into the following period.
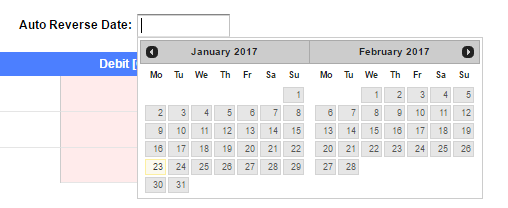
To create a reversing journal all you need to do is enter a date in the “Auto Reverse Date” box.
To cancel a reversing journal, simple clear the date box and save. Reversing journals can be distinguished on your main journal list by the two opposing arrows icon.
When you save a journal with an auto reverse date, QuickFile will create the reversing entries instantaneously. Any changes to the parent journal will automatically filter through to the reversing journal.
Journal Folders
Journal folders make it easier to group your journals under logical headers. You will find a number of preset folders such as VAT, Payroll, Opening Balances etc. You can also create your own custom folders and then easily filter your journals in the search.

To help you get started with journal folders we’ve created a simple auto-assignment task that you can run to automatically group your existing journals. You will find this option in the main journal list.
You can also manually assign your journals to folders from the main journal list or when the journal is created in the journal editor.