Menu Customisation
Introduction
QuickFile has a built in horizontal and vertical menu system that is designed to provide convenient access to all areas of the QuickFile platform. The horizontal menu runs across the top of the screen and includes several sub-headers that provide access to all key areas.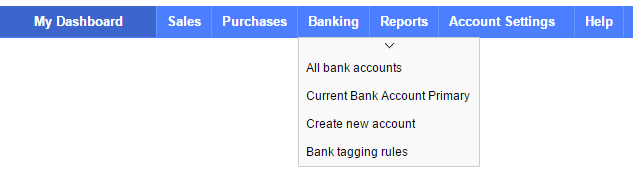
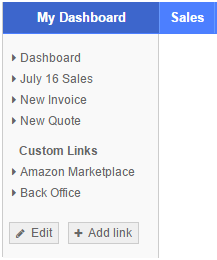
There is also a vertical menu that is fixed to the left hand part of the screen. We refer to this as the QuickLinks menu and it has the advantage of being fully customisable. Each team member on your account can also have their own customised menu.
Adding a custom link
There are two simple ways to add links to your menu. If you’d like to add a link to a page within QuickFile, simply navigate to the page and click the Add link button. You will then see the following options:
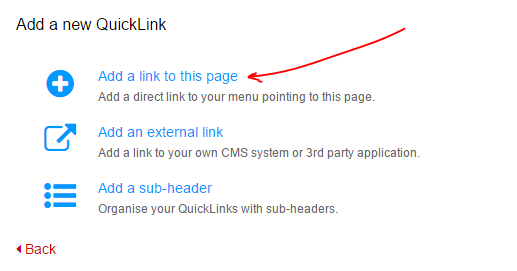
Click the option “Add a link to this page”. You can then give your link a name and hit save, the link will appear instantly on your menu. If you are logged in as the administrative user you will also be able to add this link for all your team members.
On the previous menu you will also find an option to “Add an external link”. This can be used to link to resources outside of QuickFile, this may be another cloud application you are using or perhaps your own back office or CMS application. To add an external link you just need to provide the full link (including http:// or https://) and a short name that will be visible in your menu.

Organising your menu
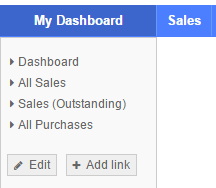
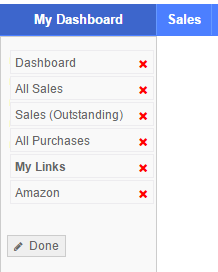
Once you’ve added your links you can now sort the order in which they appear, delete any links and even add your own sub-headers. To rearrange/delete links simply click the Edit button. Once you’ve finished click Done.
To add a sub-header to a menu click the Add link button and select the option “Add a sub-header”. Then simply give the sub-header a name and save. You can then use the sort order method to position the sub-header and it’s children accordingly.