Prepayments and credits
Introduction
From time to time you may want to assign a prepayment or credit to a client or supplier, without actually allocating it to an invoice. In this guide we will look at how you can assign a credit, hold it on account and assign to an invoice later. In the following example we will look at assigning a client credit. The same principle applies for supplier credits.Adding a New Prepayment
From scratch
Let's start by locating the client whom you wish to assign the credit to, you can do a quick search on the main Dashboard. Once you are in the client detail screen you will see a slide-out panel like the one below:
This highlights the current balance owed and pre-paid in each currency. To add a new prepayment here, you will need to click on the More Options button and select New Prepayment. This will bring up a new dialogue box.

In the dialogue box you can enter the amount, receiving bank account, date, payment method and VAT (where applicable). Once saved the credit will show in the credit summary box. If you have the multi-currency feature switched on, you can apply credits with differing currencies.
From a bank transaction
If you have a bank transaction you need to assign to a client's account, you can do so by through QuickFile's tagging system.The first step is to click the red ‘Tag Me!’ button, and select 'Payment from a client. This will present you with a list of outstanding invoices where the amount matches. However, in some cases a prepayment won’t have an invoice to assign it to, so you need to select 'Pay down multiple invoices or assign to a client account

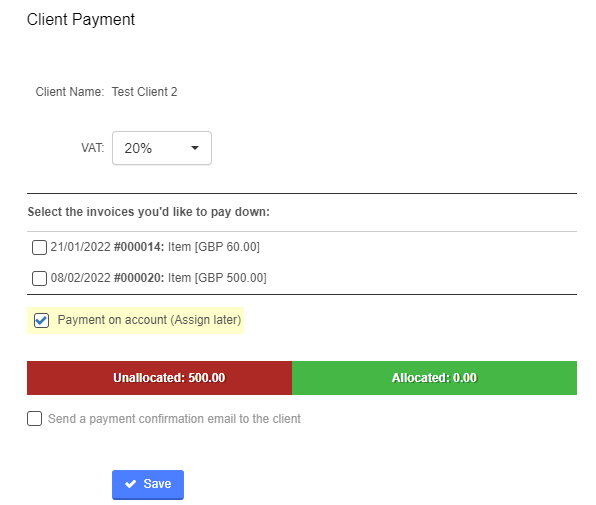
This will prompt you to do a search for your client. Once you’ve done this, if they have outstanding invoices it will show you a list of these with an option to Assign to account. Ensure the VAT rate is correct (where applicable), and click Save.
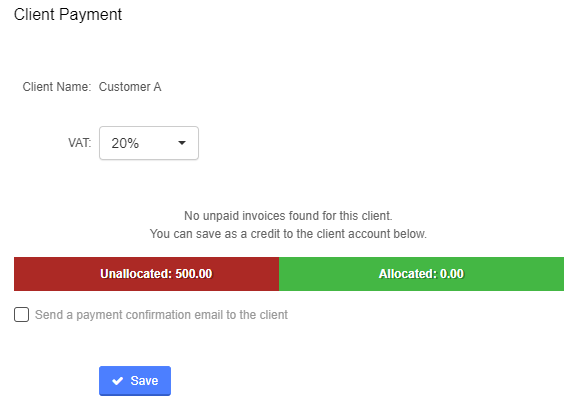
If there are no invoices, simply ensure the VAT rate is correct (where applicable) and click ‘Save’
Assigning the credit to an invoice
This credit will remain on the client's account until you assign it to pay down an invoice. To assign a credit to an invoice all you need to do is locate the invoice and click on the button to log a payment. Any credit associated to that particular client will be highlighted in the yellow bar. To assign the credit just check the box and save.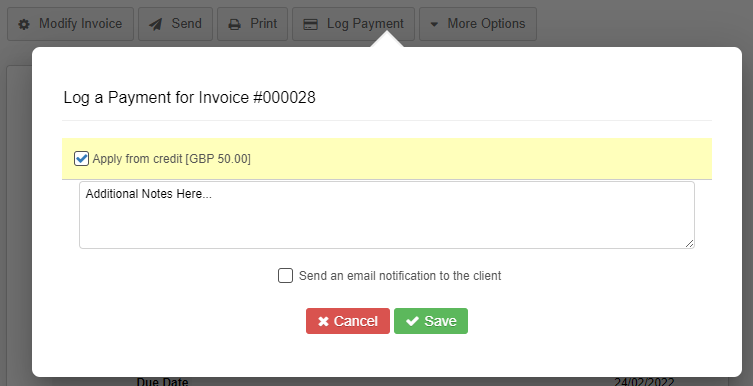
And that’s all there is to it! Remember the same principle can applied to suppliers.
Locate the origins of a prepayment
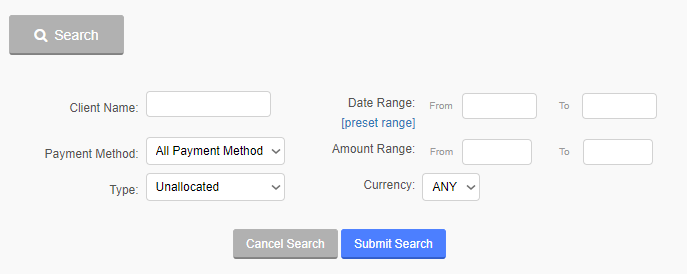
Occasionally you may be applying a payment to a client or supplier invoice and a credit will appear on the payment dialogue box. You may be wondering where that credit came from?To locate the origins of a prepayment, simply navigate to the client/supplier detail screen and click the “View” button followed by “All Payments”. Now in the advanced search you will be able to filter all “Unallocated” payments.

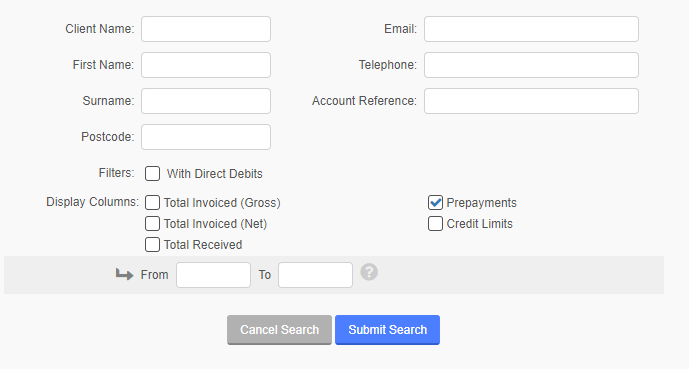
Don’t forget you can also use the search feature in the client list screen to see a list of all clients with prepaid credits.