- Introduction
- Switching on the recurring purchase feature
- How do I set up a new recurring purchase?
- What happens when a new purchase invoice is created from a schedule?
- Where can I see all my recurring purchase profiles together?
- How do I modify or delete a recurring purchase profile?
- How can I change the details of the invoices being created?
Recurring purchase profiles
Introduction
With QuickFile you can take any purchase invoice and use this as the basis to automatically repeat the purchase in accordance with a predefined schedule. This is useful for subscription based products such as broadband, rent and any type of recurring charge that tends not to change from one month to the next.
Switching on the recurring purchase feature
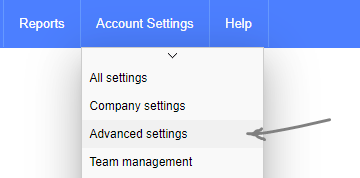
The recurring purchase feature is not enabled by default. To switch this feature on head over to Account Settings >> Advanced settings.
On the Advanced Settings page scroll down and you will see an option to enable recurring purchases, save and continue.
How do I set up a new recurring purchase?
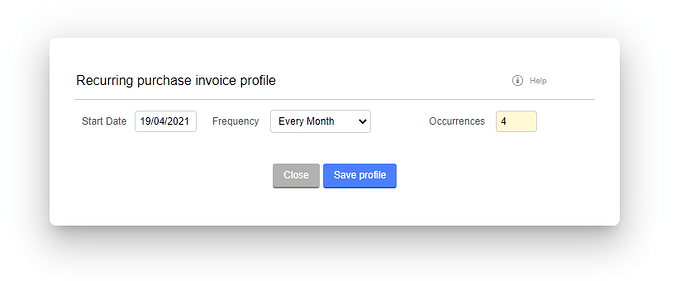
Setting up a recurring purchase profile is really simple. Just locate any purchase you would like to repeat and on the preview screen open the “More Options” menu and select “Setup a recurring schedule”. A dialogue box will appear where you can define the start date, frequency, and number of occurrences.
Once you save these options your new recurring profile will be active. The next due date will be confirmed in the green confirmation box.
What happens when a new purchase invoice is created from a schedule?
When a new purchase invoice is created from your profile, the details of the invoice will match the parent invoice, but with a new receipt date and receipt number. Whenever a new purchase invoice is created from a profile, an event will be logged, these events will be associated to the parent invoice so you can easily see all the purchases generated from that parent.
No payment will be lodged against any new invoice created from a recurring profile so the balance will be added to the total amount owed (visible on your Dashboard). It is therefore advisable to wait for the payment to appear on your bank and then tag this to the UNPAID invoice generated by your profile.
Where can I see all my recurring purchase profiles together?
When the recurring purchase feature is switched on at account level, a new menu item will appear ‘Recurring purchases’ in the Purchases menu header. Click on this option to see a list of all your active recurring purchase profiles. You can easily review all the next calculated due dates and order these chronologically.
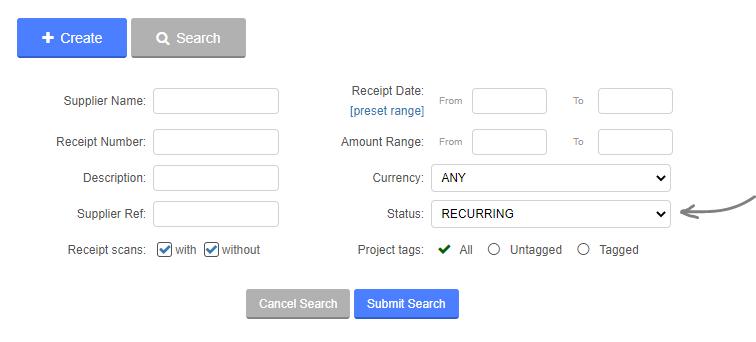
Another method for showing all recurring purchases would be to head to the purchase management screen, click on “Search” and set the status to “RECURRING”.
How do I modify or delete a recurring purchase profile?
To modify or delete a recurring purchase profile simply locate the parent purchase invoice to which the profile is associated. In the “More Options” menu select “Update a recurring schedule”. You will now see a dialogue box where you can delete or update the schedule.
How can I change the details of the invoices being created?
To modify the particulars of a recurring purchase invoice all you need to do is modify the original purchase. Any subsequent invoices derived from the parent invoice will assume the same details. If you cannot modify the original parent invoice due to it being locked (i.e. from a VAT return or filed accounting period) you will need to delete the profile and setup a new profile on a similar purchase invoice that has not been locked.


